请注意,本文编写于 244 天前,最后修改于 241 天前,其中某些信息可能已经过时。
目录
1.消息队列

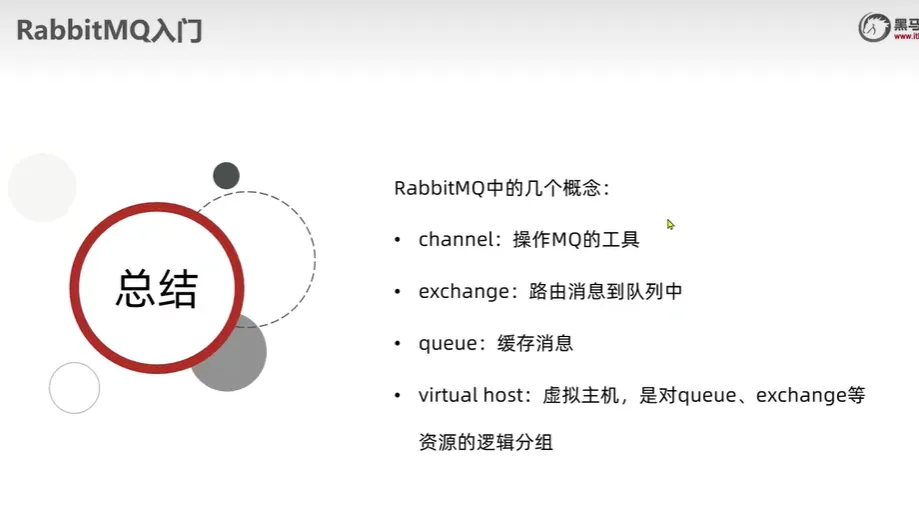
2.基础概念
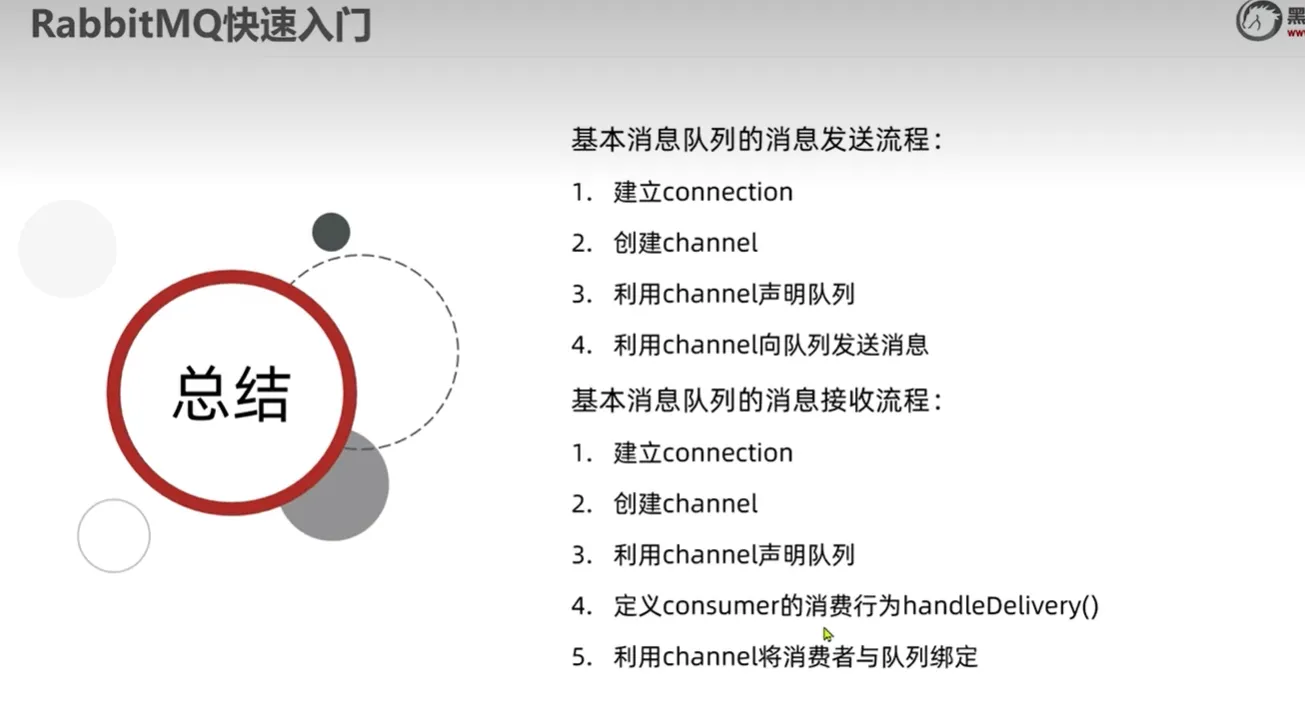
3.Hello World案例
(1)publisherTest
javapublic class PublisherTest {
    @Test
    public void testSendMessage() throws IOException, TimeoutException {
        // 1.建立连接
        ConnectionFactory factory = new ConnectionFactory();
        // 1.1.设置连接参数,分别是:主机名、端口号、vhost、用户名、密码
        factory.setHost("192.168.42.10");
        factory.setPort(5672);
        factory.setVirtualHost("/");
        factory.setUsername("itcast");
        factory.setPassword("123321");
        // 1.2.建立连接
        Connection connection = factory.newConnection();

        // 2.创建通道Channel
        Channel channel = connection.createChannel();

        // 3.创建队列
        String queueName = "simple.queue";
        channel.queueDeclare(queueName, false, false, false, null);

        // 4.发送消息
        String message = "hello, rabbitmq!";
        channel.basicPublish("", queueName, null, message.getBytes());
        System.out.println("发送消息成功:【" + message + "】");

        // 5.关闭通道和连接
        channel.close();
        connection.close();

    }
(2)ConsumerTest代码
javapublic static void main(String[] args) throws IOException, TimeoutException {
        // 1.建立连接
        ConnectionFactory factory = new ConnectionFactory();
        // 1.1.设置连接参数,分别是:主机名、端口号、vhost、用户名、密码
        factory.setHost("192.168.42.10");
        factory.setPort(5672);
        factory.setVirtualHost("/");
        factory.setUsername("itcast");
        factory.setPassword("123321");
        // 1.2.建立连接
        Connection connection = factory.newConnection();

        // 2.创建通道Channel
        Channel channel = connection.createChannel();

        // 3.创建队列
        String queueName = "simple.queue";
        channel.queueDeclare(queueName, false, false, false, null);

        // 4.订阅消息
        channel.basicConsume(queueName, true, new DefaultConsumer(channel){
            @Override
            public void handleDelivery(String consumerTag, Envelope envelope,
                                       AMQP.BasicProperties properties, byte[] body) throws IOException {
                // 5.处理消息
                String message = new String(body);
                System.out.println("接收到消息:【" + message + "】");
            }
        });
        System.out.println("等待接收消息。。。。");
    }
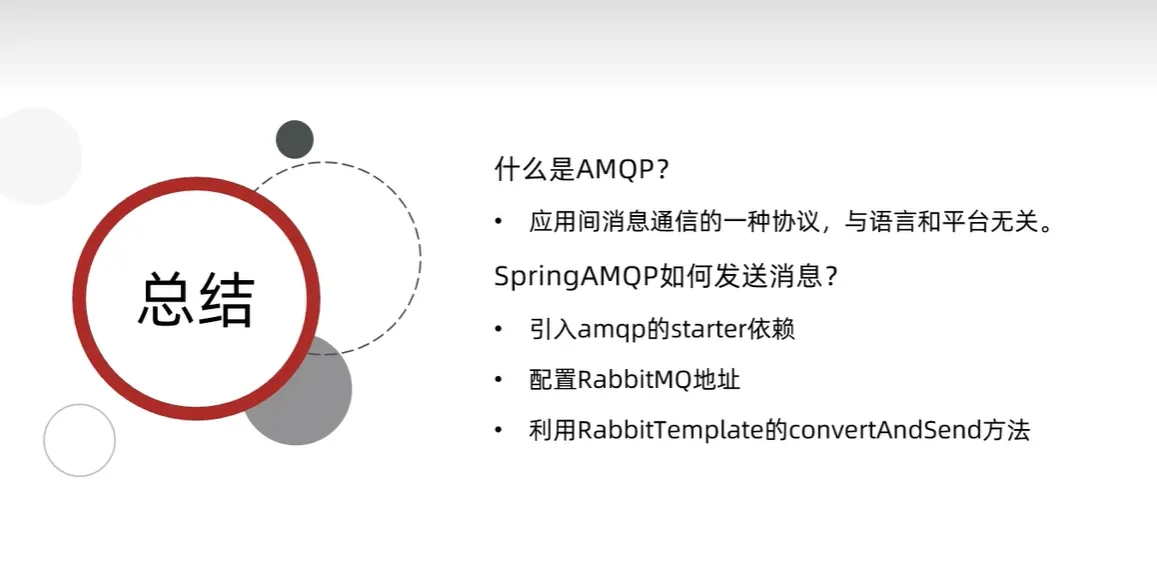
4.Spring AMQP
 利用Spring AMQP实现HelloWorld案例
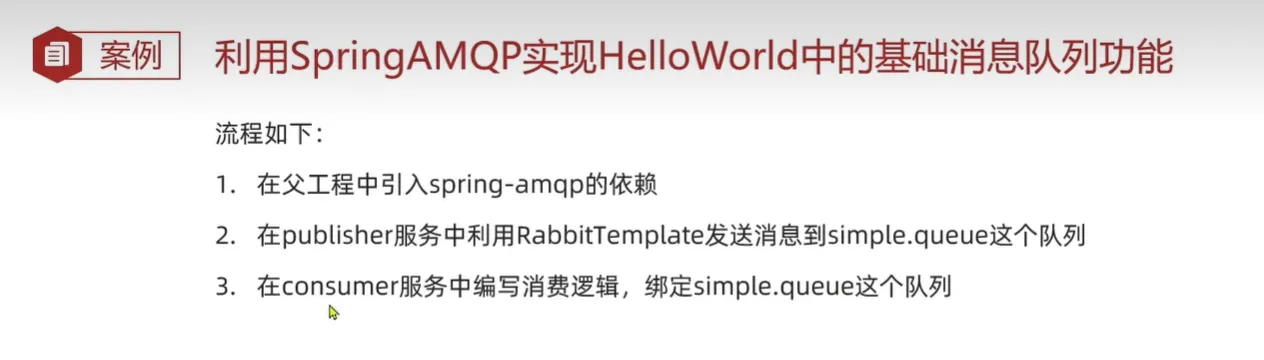
pom<dependency> <groupId>org.springframework.boot</groupId> <artifactId>spring-boot-starter-amqp</artifactId> </dependency>
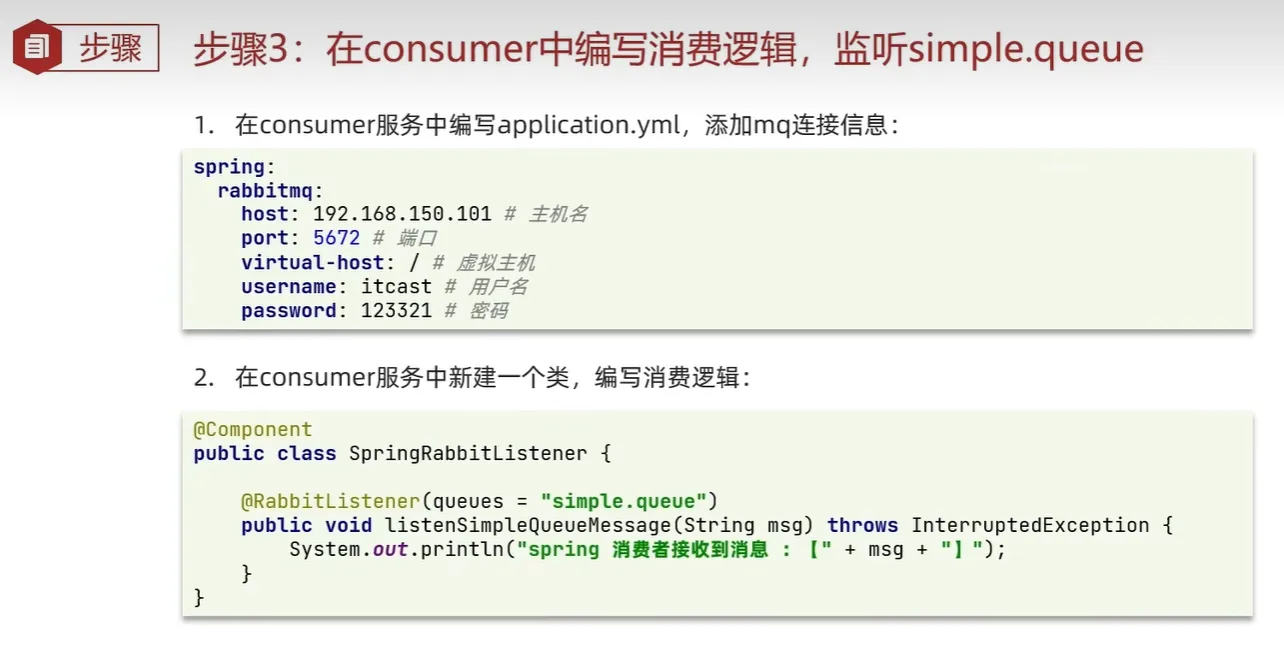
编写配置
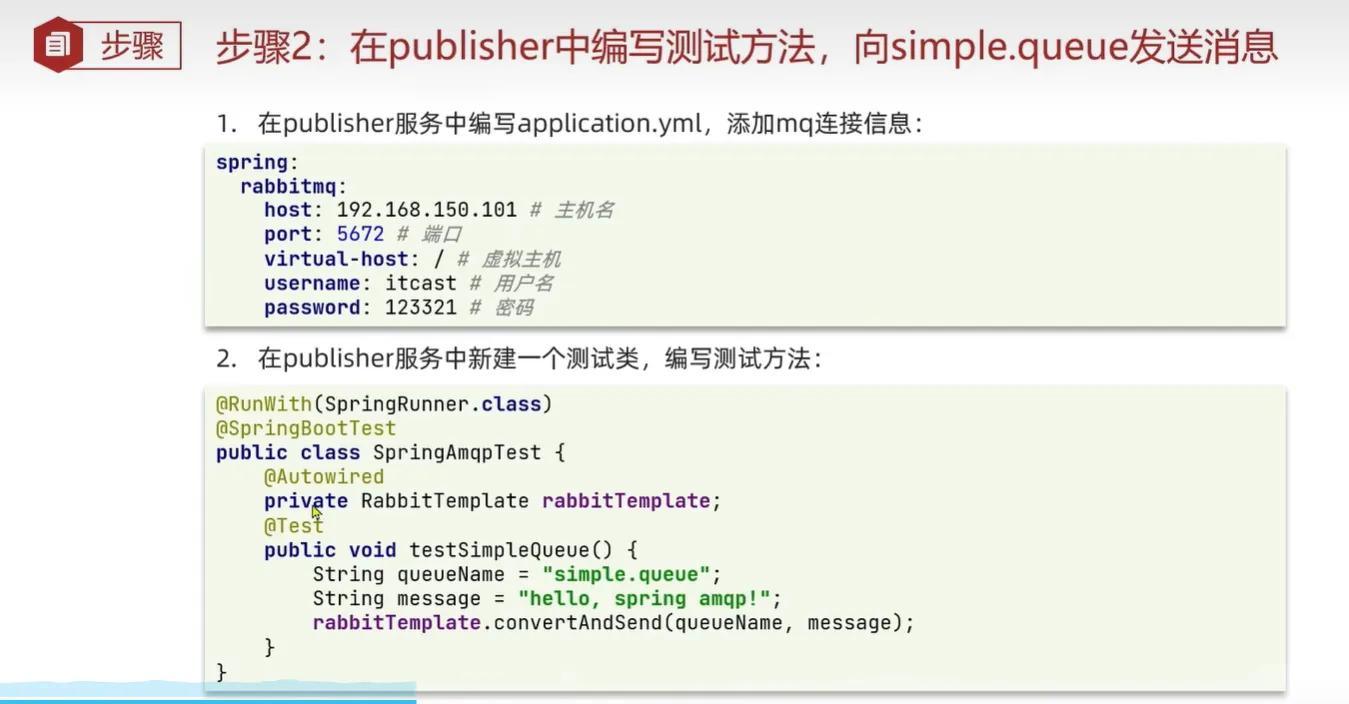 编写测试
编写测试
java@RunWith(SpringRunner.class)
@SpringBootTest
public class SpringAmqpTest {
    @Autowired
    private RabbitTemplate rabbitTemplate;

    @Test
    public void RabbitMqTest(){
        String queueName = "simple.queue";
        String message = "Hello World";
        rabbitTemplate.convertAndSend(queueName,message);
    }
}
 接收消息
接收消息
5.工作队列 work queue
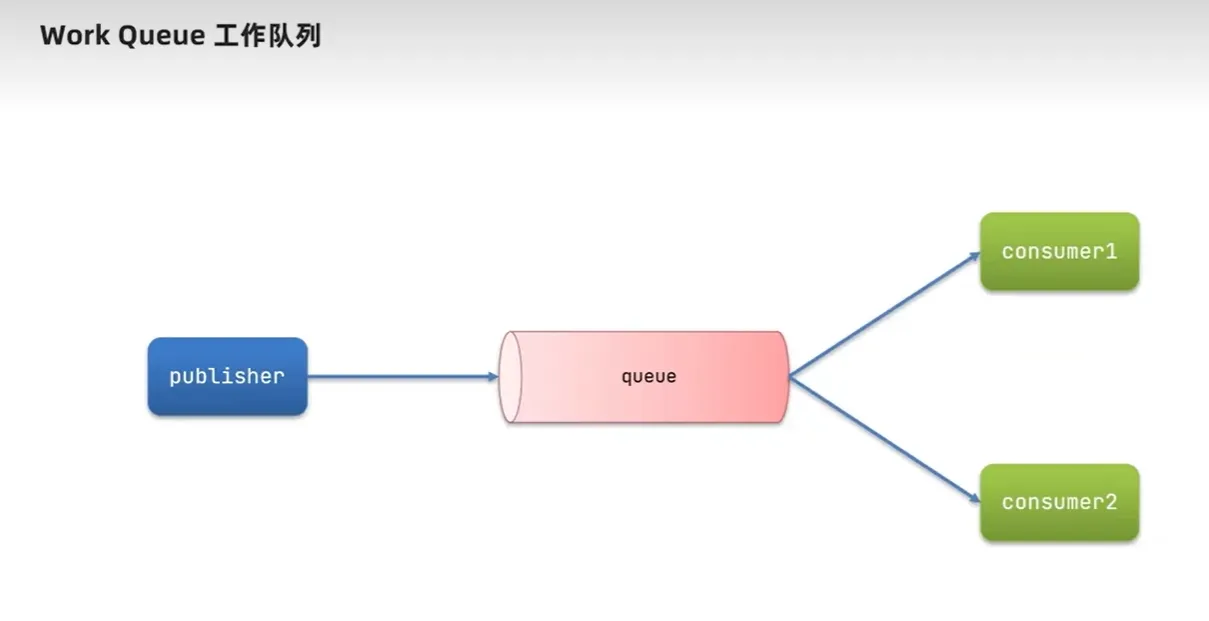 案例
案例
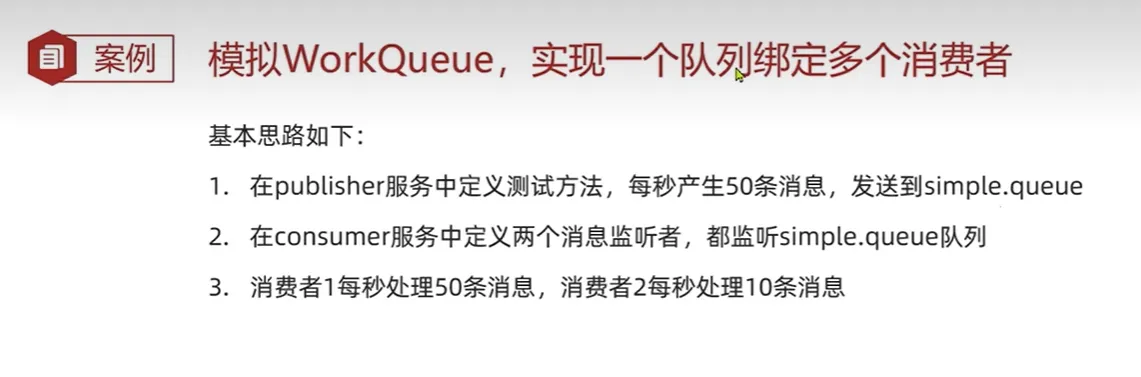 发布50条数据到队列
java    @Test
    public  void RabbitMqTestWorkQueue() throws InterruptedException {
        String queueName = "simple.queue";
        String message = "Hello World__";
        for (int i = 1;i<=50;i++){
            rabbitTemplate.convertAndSend(queueName,message+i);
            Thread.sleep(20);
        }
    }
接受数据
java    @RabbitListener(queues = "simple.queue")
    public void lisstenerWorkQueue1(String msg) throws InterruptedException {
        System.out.println("消费者1接收到消息:["+msg+"]");
        Thread.sleep(20);
    }

    @RabbitListener(queues = "simple.queue")
    public void lisstenerWorkQueue2(String msg) throws InterruptedException {
        System.err.println("消费者2接收到消息:["+msg+"]"+ LocalTime.now());
        Thread.sleep(200);
    }
显示数据
log消费者2接收到消息:[Hello World__1]16:28:43.674
消费者1接收到消息:[Hello World__2]
消费者1接收到消息:[Hello World__4]
消费者1接收到消息:[Hello World__6]
消费者2接收到消息:[Hello World__3]16:28:43.874
消费者1接收到消息:[Hello World__8]
消费者1接收到消息:[Hello World__10]
消费者1接收到消息:[Hello World__12]
消费者1接收到消息:[Hello World__14]
消费者2接收到消息:[Hello World__5]16:28:44.088
消费者1接收到消息:[Hello World__16]
消费者1接收到消息:[Hello World__18]
消费者1接收到消息:[Hello World__20]
消费者2接收到消息:[Hello World__7]16:28:44.304
消费者1接收到消息:[Hello World__22]
消费者1接收到消息:[Hello World__24]
消费者1接收到消息:[Hello World__26]
消费者1接收到消息:[Hello World__28]
消费者2接收到消息:[Hello World__9]16:28:44.517
消费者1接收到消息:[Hello World__30]
消费者1接收到消息:[Hello World__32]
消费者1接收到消息:[Hello World__34]
消费者2接收到消息:[Hello World__11]16:28:44.729
当消费者接受数据时会预取数据两个消费者平分数据
 可以修改预取值来控制消费者按照处理速度修改提高效率
data消费者2接收到消息:[Hello World__1]16:36:22.113
消费者1接收到消息:[Hello World__2]
消费者1接收到消息:[Hello World__3]
消费者1接收到消息:[Hello World__4]
消费者1接收到消息:[Hello World__5]
消费者1接收到消息:[Hello World__6]
消费者1接收到消息:[Hello World__7]
消费者1接收到消息:[Hello World__8]
消费者2接收到消息:[Hello World__9]16:36:22.346
消费者1接收到消息:[Hello World__10]
消费者1接收到消息:[Hello World__11]
消费者1接收到消息:[Hello World__12]
消费者1接收到消息:[Hello World__13]
消费者1接收到消息:[Hello World__14]
消费者1接收到消息:[Hello World__15]
消费者1接收到消息:[Hello World__16]
消费者2接收到消息:[Hello World__17]16:36:22.597
修改过后提高处理速度
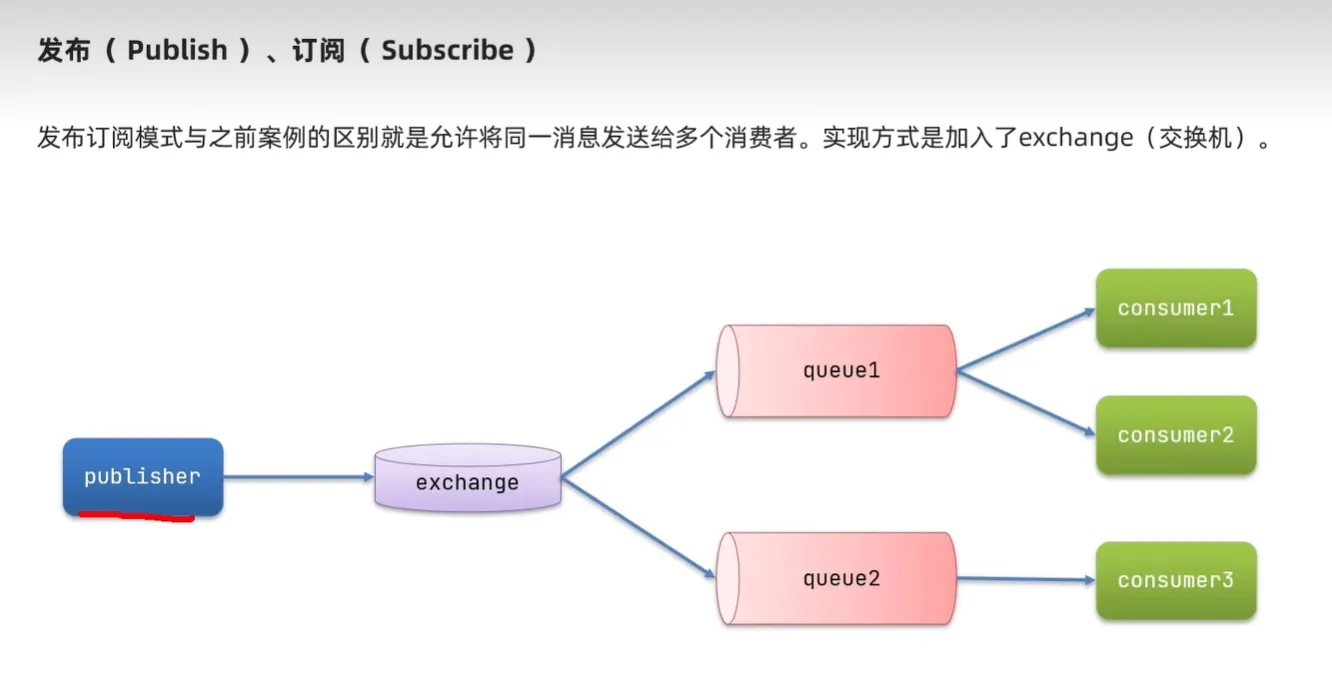
6.发布订阅模式
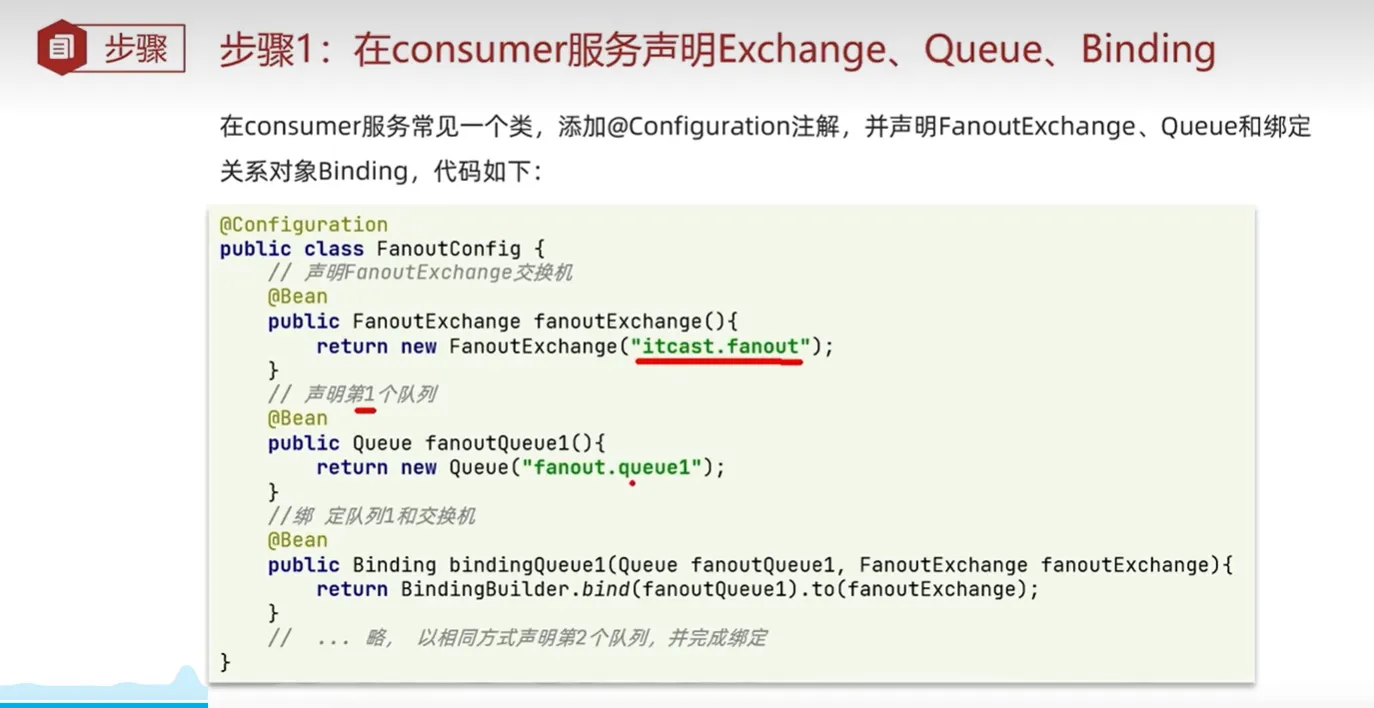
java@Configurable
public class FanoutConfig {

//    创建交换机
    @Bean
    public FanoutExchange fanoutExchange(){
        return new FanoutExchange("itcast.fanout");
    }
//创建消息队列1
    @Bean
    public Queue fanoutQueue1(){
        return new Queue("itcast.fanout1");
    }
//绑定消息队列1到交换机
    @Bean
    public Binding fanoutBinding1(Queue fanoutQueue1,FanoutExchange fanoutExchange){
        return BindingBuilder.bind(fanoutQueue1).to(fanoutExchange);
    }
//创建消息队列2
    @Bean
    public Queue fanoutQueue2(){
        return new Queue("itcast.fanout2");
    }
//绑定消息队列2到交换机
    @Bean
    public Binding fanoutBinding2(Queue fanoutQueue2,FanoutExchange fanoutExchange){
        return BindingBuilder.bind(fanoutQueue2).to(fanoutExchange);
    }
}
编写接收消息代码
java    @RabbitListener(queues = "fanout.queue1")
    public void lisstenerWorkQueue1(String msg) throws InterruptedException {
        System.out.println("消费者1接收到消息:["+msg+"]");
        Thread.sleep(20);
    }

    @RabbitListener(queues = "fanout.queue2")
    public void lisstenerWorkQueue2(String msg) throws InterruptedException {
        System.err.println("消费者2接收到消息:["+msg+"]"+ LocalTime.now());
        Thread.sleep(200);
    }
修改publisher端代码
java    @Test
    public void RabbitMqTestWorkQueue2() throws InterruptedException {
        String queueName = "itcast.fanout";
        String message = "Hello World test fanout";
        rabbitTemplate.convertAndSend(queueName,"",message);
    }
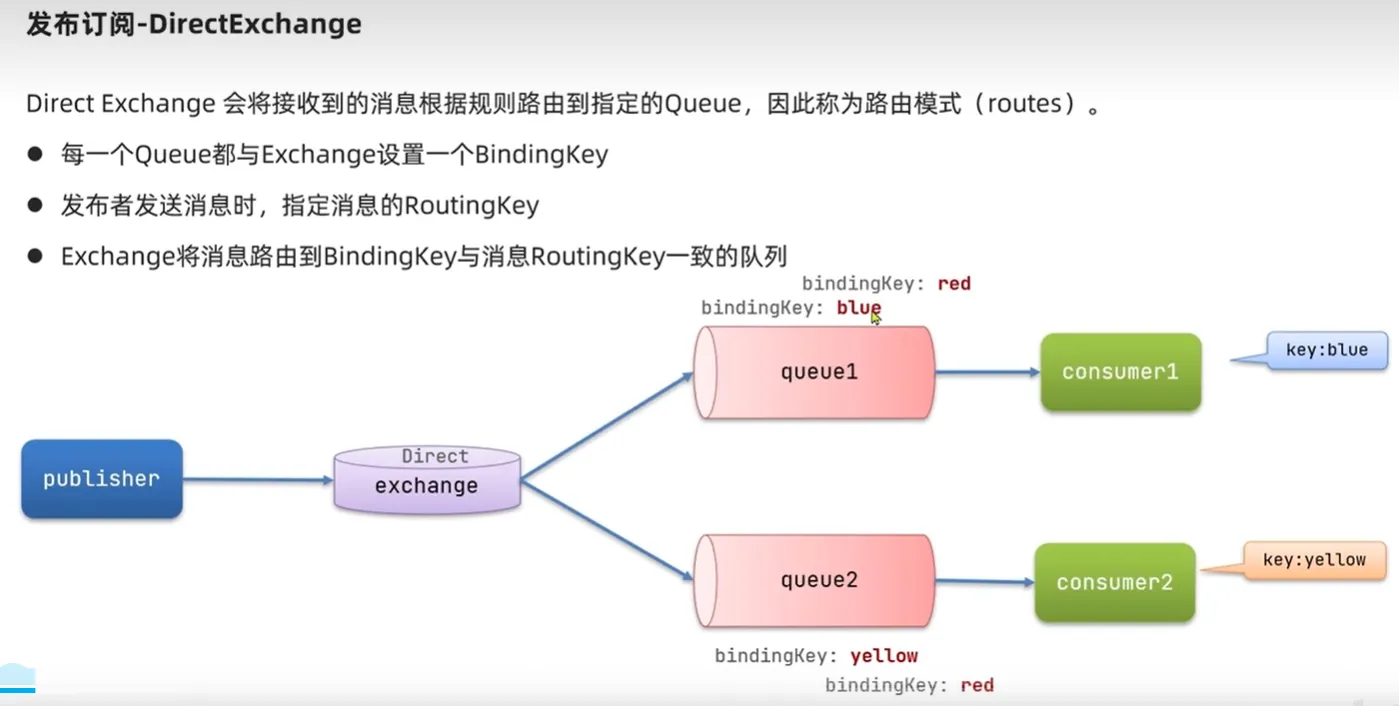
7.路由模式
 修改消费者监听代码
java    @RabbitListener(bindings = @QueueBinding(
            value = @Queue(name = "direct.queue1"),
            exchange = @Exchange(name = "itcast.direct",type = ExchangeTypes.DIRECT),
            key = {"red","blue"}
    ))
    public void listenDirectQueue1(String msg)   {
        System.out.println("消费者接收到direct.queue1消息:"+msg);
    }


    @RabbitListener(bindings = @QueueBinding(
            value = @Queue(name = "direct.queue2"),
            exchange = @Exchange(name = "itcast.direct",type = ExchangeTypes.DIRECT),
            key = {"red","yellow"}
    ))
    public void listenDirectQueue2(String msg)   {
        System.out.println("消费者接收到direct.queue2消息:"+msg);
    }
修改发布者发布代码
java    @Test
    public void RabbitMqTestWorkQueue2() throws InterruptedException {
        String queueName = "itcast.direct";
        String message = "Hello yellow";
        rabbitTemplate.convertAndSend(queueName,"yellow",message);
    }
发布者只发布给yellow
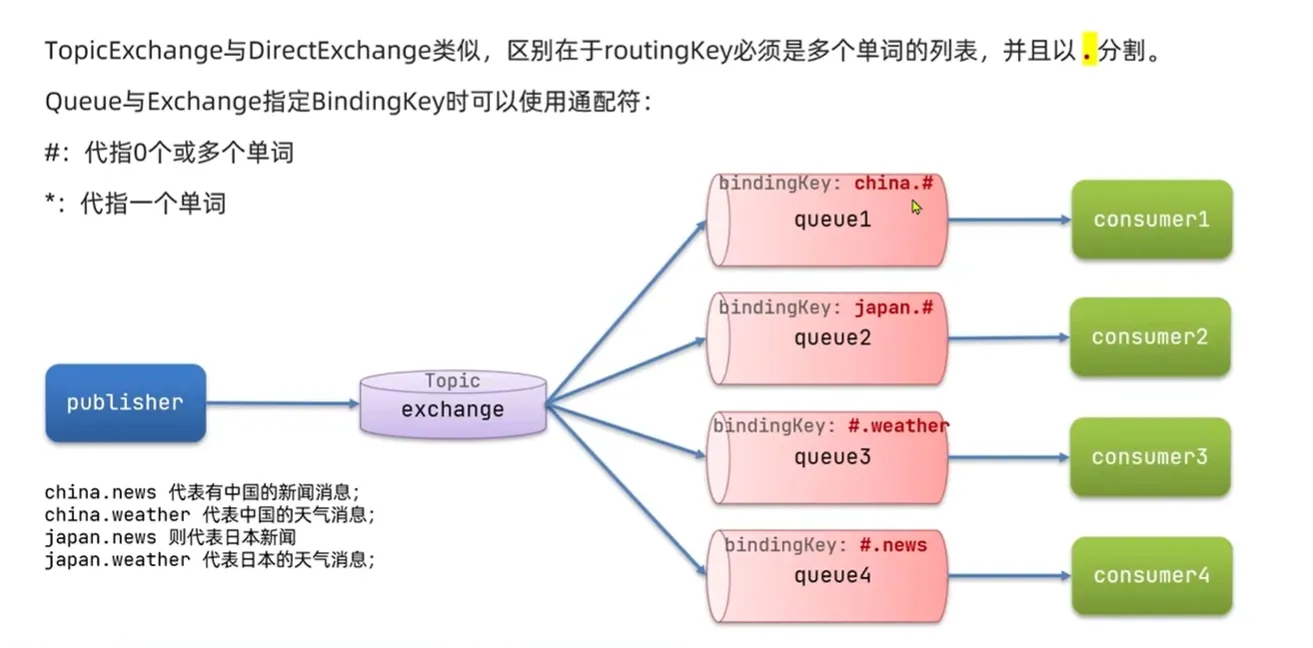
8.发布订阅 TopicExchange
通配符订阅
 交换机配置部分不变修改listen部分代码
java    @RabbitListener(bindings = @QueueBinding(
            value = @Queue(name = "topic.queue1"),
            exchange = @Exchange(name = "itcast.topic",type = ExchangeTypes.TOPIC),
            key = "china.#"
    ))
    public void listenTopicQueue1(String msg)   {
        System.out.println("消费者接收到topic.queue1消息:"+msg);
    }


    @RabbitListener(bindings = @QueueBinding(
            value = @Queue(name = "topic.queue2"),
            exchange = @Exchange(name = "itcast.topic",type = ExchangeTypes.TOPIC),
            key = "#.news"
    ))
    public void listenTopicQueue2(String msg)   {
        System.out.println("消费者接收到topic.queue2消息:"+msg);
    }
发送端测试
java    @Test
    public void RabbitMqTestTopicQueue3() throws InterruptedException {
        String queueName = "itcast.topic";
        String message = "Hello china";
        rabbitTemplate.convertAndSend(queueName,"china.news",message);
    }
9.消息转换器
(1)创建一个消息队列
java    @Bean
    public Queue fanoutQueue3(){
        return new Queue("object.queue");
    }
(2)向"object.queue"发送对象数据
java    @Test
    public  void sendObjectQueue(){
        Map<String,Object> msg = new HashMap<>();
        msg.put("name","柳岩");
        msg.put("age",18);
        rabbitTemplate.convertAndSend("object.queue",msg);
    }
(3)获取数据
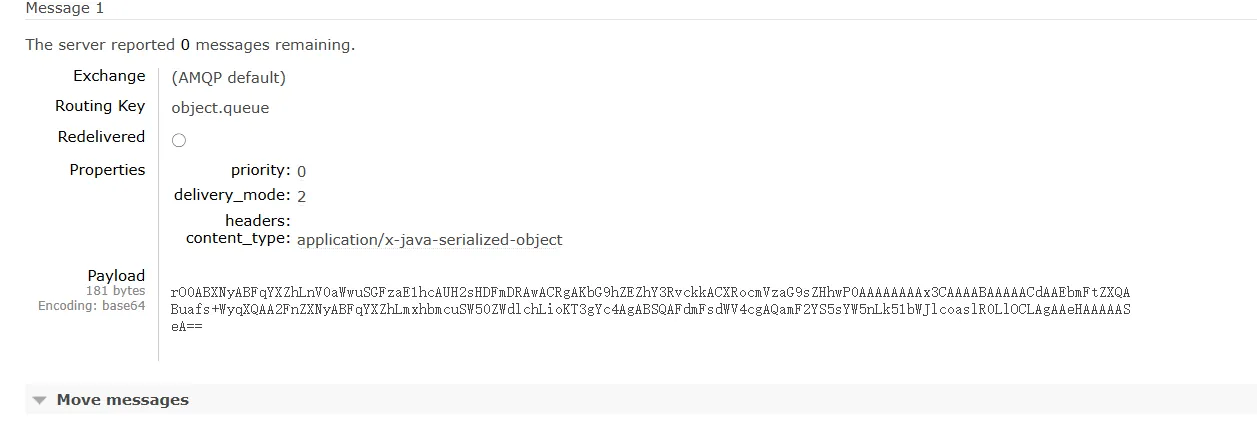 上面传输的对象数据并没有配置消息转换器无法直接查看
(4)配置消息转换器

pom<dependency> <groupId>com.fasterxml.jackson.dataformat</groupId> <artifactId>jackson-dataformat-xml</artifactId> <version>2.9.10</version> </dependency>
java    @Bean
    public MessageConverter jsonMessageConverter() {
        return new Jackson2JsonMessageConverter();
    }
 消息转换器配置成功
(5)消费端输出接收到的消息
配置消息转换器并编写队列监听代码
java    @RabbitListener(queues = "object.queue")
    public void listenObjectQueue(Map<String,Object> msg)   {
        System.out.println("接收到object.queue:"+msg);
    }
本文作者:钱小杰
本文链接:
版权声明:本博客所有文章除特别声明外,均采用 BY-NC-SA 许可协议。转载请注明出处!
目录